Controlling Drums in Church
By David McLain
Any time a band has some of its sound coming through the main PA system (usually vocals and electronic instruments) and some of the sound coming from the stage acoustically (most notably the drums) you have problems. The drummer must play loud enough to keep up with the sound system, which he cannot hear. However, playing loudly enough for the back row of listeners means that the drums are often too loud for the first several rows. It's even louder on stage, which requires the rest of the band to play louder and turn up the stage monitors.
The result is a stage volume that is overwhelmingly too loud for the room, often louder than the main sound system in the room, and still unclear. People get frustrated and irritable, and some leave to find another church where they can understand the music playing.
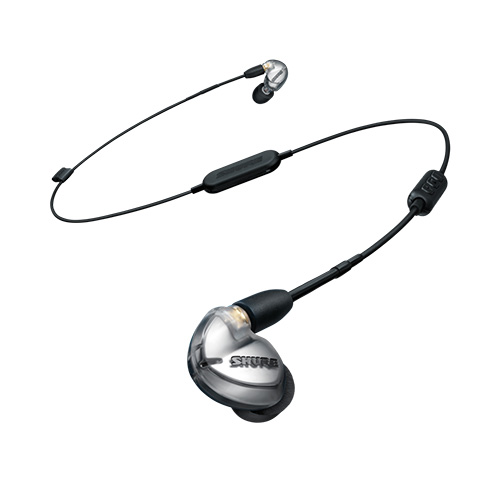 Shure's SE425 In-Ear Monitors
In-ear Monitors will help the musicians on stage, but the heart of solving the drums' volume problem is to control the volume of the drums. There are three steps in controlling drum volume in church:
- Contain the acoustic energy from the drums
- Absorb the acoustic energy from the drums
- Reinforce the sound that you want from the drums
Contain the Acoustic Energy from the Drums
Containing the acoustic energy from the drums is the easiest part. The sound of the drums travels from the drum head to the ears of the people in the audience. The strongest part of that sound is generally direct line-of-sight. Many churches have installed plexiglass drum shields around the drums for this purpose. It's cost-effective and it's a reasonably effective starting point. The plexiglass reflects most sound, preventing the direct line-of-sight sound from reaching the people in the congregation. This solves one problem and introduces a couple of new ones.
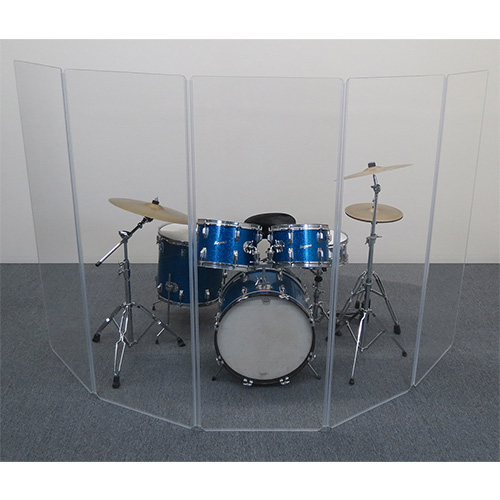 ClearSonic Drum Shields
Plexiglass does not absorb sound; virtually all of the noise created by the drums is reflected; that means that the sound is still in the room, it's just not traveling to the listeners in a direct route. The drummer often feels more confident now that he's behind the plexiglass, and often times he plays harder, creating even more sound than before. Now that sound is bouncing around the room as reflected sound.
Reflected sound is, by definition, noise: it has the same amount of energy as direct sound, but because it is reflected, it has become "incoherent." Now instead of hearing the clear "slap" of the snare from a single source, we hear reflections of that slap from various reflective surfaces around the room. The clarity is decreased, but the energy of the snare is still there, rattling around the room, muddying up the rest of the sound.
The second problem with a plexiglass drum cage is that the first reflection of noise is concentrated back at the drummer's ears. The potential for hearing damage is immensely increased. That's one reason some drummers want to play loudly, they can't hear the sound as well as they used to, so they feel the need to play louder.
The result of plexiglass by itself is that the total energy of noise is not decreased. Instead, it's just bouncing around the room, making the rest of the sound muddy, and damaging the drummer's hearing.
Absorb the Acoustic Energy From the Drums
After we block the direct sound of the drums with a plexiglass drum shield, the next step is to absorb a good portion of the sound, to keep it from filling the room with incoherent echoes. This is generally accomplished with sound-absorptive foam.
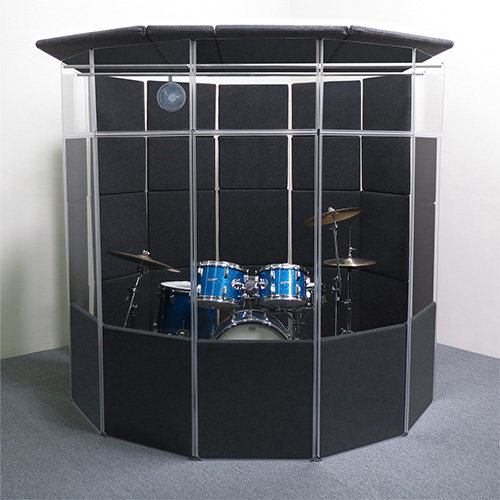 ClearSonic's MegaPac
Generally, the foam is installed in three locations: on the wall behind the drummer, on the plexiglass itself, and as sound-absorptive "lid" over the top of the drummer.
How much absorption to install is governed by several factors, some practical and some aesthetic. Since the drummer needs to be able to see the rest of the band, it's best to not block all of the plexiglass. Rather, install foam along the bottom and sides of the plexiglass.
Generally, the foam in front is not installed above the height of the drumheads themselves, and often only to the top of the kick drum. On the sides, install the foam higher, particularly on the side with the snare and hihat, as these are the greatest sources of noise. Install a greater amount of sound absorption on the wall behind the drummer.
To this point, we have been reducing the overall volume of the drums. The stage volume is under control, so the musicians can hear themselves, and the sound from the stage doesn't overwhelm the main speakers. The front several rows of the congregation are no longer being overwhelmed by sound, But now the back part of the audience isn't being reached.
Reinforce the Sound That You Want From the Drums
The third step of controlling the drum sound is to put the drums into the sound system. At the very least, you'll need to mic the kick drum, the snare drum, and the hihat. Ideally, you'd mic those, each tom, and incorporate a pair of overhead mics.
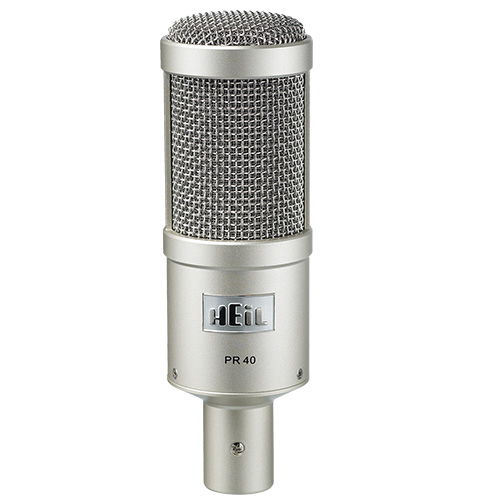 Heil Sound's PR 40
As far as mic selection goes, my preference is to use a large-diaphragm mic on the kick drum. Some dynamic mics like the Shure Beta 52 or the Audix D6 are solid and include some kick drum EQ. The Heil PR40 is an outstanding kick drum mic, but you'll probably work harder on the equalization.
Historically, dynamic mics tend to capture the "boom" of a kick drum well, and condensers can capture the "snap" of the sound. The Audio Technica AE2500 has both a condenser capsule and a dynamic capsule in it on separate XLRs for equalizing separately.
You'll need a condenser mic on your hi-hat. The Shure SM81 and the AKG C451 are both great options, but if your budget will stretch to include a Neumann KM184, you'll be a happy engineer. The AT Pro37R is perfect is you are on a tight budget.
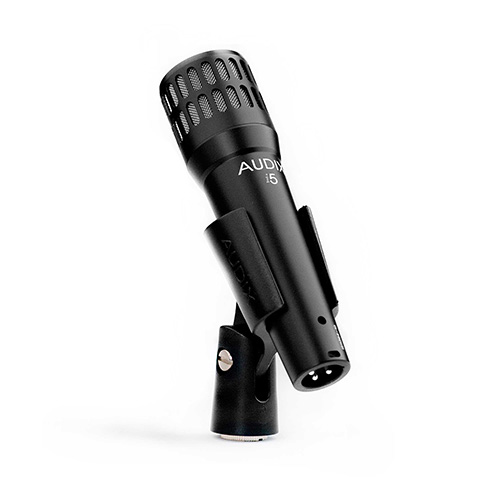 Audix's i5 Dynamic Mic
Your first choice for a snare mic is a simple dynamic microphone. The ubiquitous Shure SM57 is easily the most popular, if only because it used to be the only option. The Audix I5 or Heil PR28 are more current, and perhaps more precise, drum mics, and they hold up better under accidental whacks from overly-enthusiastic drumsticks and keep working well.
Dynamic mics can also be used on the toms, but there are several smaller condenser mics that have become popular, like the AKG C417 or the Sennheiser E604. These small, specialized mics generally come with their own mic clips which attach directly to the drum itself, reducing the number of stands and cables sticking out of the drum kit, and allowing the plexiglass drum shield to be brought in nice and tight.
In a large room, you'll want to add a pair of overhead mics, to capture the overhead cymbals and the overall ambiance of the drum kit. The AKG C414 is famous for doing this work brilliantly, but it won't fit in everybody's budget.
Small condenser mics have often been preferred for their discreet size. The Shure KSM137/SL stereo pair or a couple of Sennheiser E614s or E914s are solid choices. Even the entry-level AT Pro37R will work if you're on a tight budget.
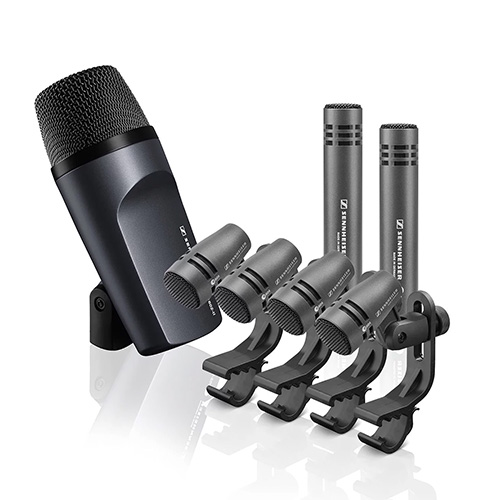 Sennheiser's DK600
In recent years, competent drum mic kits have become easy to come across. The Audix DP7, Heil HDK-7 or Sennheiser DK600 are competent kits and a great option to use in a church. If your budget is small, an entry level drum mic kit like Shure's PGA Drum Kit 7, AT's Pro-DRUM7 or Audix FP7 will work nicely for a youth room or smaller sanctuary.
Be sure to experiment with mic placement, listening closely to the sound of each mic, to determine best placement on your drum kit.
If you have the room, try using a compressor on both the kick drum and the snare. In an ideal world there would be gates on the toms, the snare and the hihat, to tighten up the noise. Most digital mixing consoles include these features, but these adjustments are often not urgent.
The main goal is to prevent the acoustic sound of the drums from either overpowering the rest of the band, or echoing around the room, by bringing the drums into the sound system with the rest of the band. You'll be surprised how much cleaner your band sounds, and how much easier it is to reduce and keep the volume under control.